So, today I received my free trial of coconut oil. I had always been tempted to try it out (I had heard tales about how marvelous it is for your hair) but, because it can be kind of pricey, I was a bit hesitant to take the plunge by purchasing it at a store. As luck would have it, I ended up as a lucky winner of a single bottle (about the size of a peanut butter container) of the stuff. According to some sources, coconut oil can:
1) Condition your hair for gorgeous locks (click HERE for more information on this beauty technique)
2) Moisturize your skin (click HERE to learn more about using coconut oil as a moisturizer
3) And, of course, be used in cooking.
1) Condition your hair for gorgeous locks (click HERE for more information on this beauty technique)
2) Moisturize your skin (click HERE to learn more about using coconut oil as a moisturizer
3) And, of course, be used in cooking.
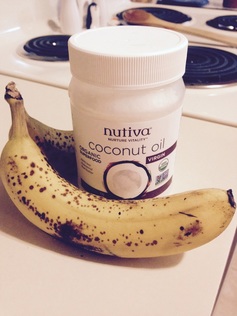
Namely, I would recommend using coconut oil sparingly in your food. After all, it is still a fat and fats, as we know, are healthy in moderation. First, let's get down and dirty with my take on coconut oil. Keep in mind that you should beware of allergies or other medical conditions before trying any new food. Also, I am not affiliated with the coconut-oil brand pictured in this post.
TASTE - In my experience with this particular kind of coconut oil, the taste of the coconut oil is kind of like unsweetened coconut, so it definitely tastes different than butter. However, it looks and does taste like an oil of some sort. You can definitely tell that it is heavy, like melted butter. So, think "coconut-infused oil" rather than just coconut.
APPEARANCE - The coconut oil melts at around 76 degrees F, so it is looks like a clear oil when it is at room temp. When you stick it in the fridge, though, it hardens up and turns white.
DISPOSING OF IT - I didn't want to put the hot oil down my sink after I was finished cooking with it (after all, this is a no-no to do with any type of oil...it stops up your sinks and is terrible for the environment). What I would recommend is letting the oil cool down in the pan until the oil freezes back (so, you're going to have to get it colder than room temp...perhaps you could put it in the fridge when the pan is cool?), then using a spatula to scrape the frozen oil out of the pan into your trash. Just as a warning, this ended up being a bit of a pain.
COOKING RECIPE - Here is the recipe that I used when I used the coconut oil -- Fried sweet bananas. It is super simple, using only:
- a single banana, cut in half down the middle. For smaller pieces, you could quarter it or make even smaller slices of banana to fry
- a teaspoon or so of the coconut oil (depending on the size of your frying pan, you might want to add more or less) -- you want just enough to coat the bottom of the pan
- half a cup or less of sugar
- a sprinkle of vanilla extract and/or a bit of cinnamon extract to taste
Steps for cooking:
1) Cut your banana in half down the middle or in even smaller pieces. Set these to the side for now.
2) In a small bowl or on a plate, put a generous amount of sugar (half a cup or so) with a sprinkle of vanilla extract and/or a small amount of ground cinnamon powder. You can always change this up if you would like, using extra seasonings such as All Spice, flavor extracts, brown sugar, etc. Try not to make it too crazy, though, since the banana is the star of this dessert.
3) Heat a saucepan to medium or medium-high heat, putting in a teaspoon or so of coconut oil. Let the oil melt and coat the pan.
4) Mix the sugar, vanilla, and cinnamon (or other chosen ingredients). My preferred method is to use my clean fingers, pinching the ingredients and tossing them gently to ensure that they all become immersed together.
5) Gently place the banana slices into the sugar mixture, coating all sides of the banana slices.
6) Move the sugar-coated banana slices to the hot pan and cook until golden brown on both sides. Be attentive! You don't want the sugar on the outside to burn.
7) Move to a pan and let cool for a minute or so. Serve when warm.
Serving suggestions for the above recipe:
- Serve with vanilla ice cream to have a sophisticated take on an ice cream sundae
- Serve on the top of a cake, using whipped cream instead of icing, to make a beautiful and unexpected celebratory treat.
- Eat with granola
- Eat alone (they are delicious as-is).
My Final Take - Would I use coconut oil again? Yeah, sure. Why not? Would I spend the $10 - $20 to buy it on my own? No. It's nice and I will enjoy using it while I have it, but I personally believe that I could have made the above recipe just as successfully (and more inexpensively) with a low-fat margarine or non-stick cooking spray. I have not tried it for any beauty purposes, though, so keep that in mind.
So, go forth and conquer, you cooking powerhouses.